Showing posts with label sewing. Show all posts

Tulips in June

Monday, 15 June 2015


Hey Guys,

Getting pictures of this dress has been a pain in the bum! I made it to wear to the House of Pinheiro hen party (but didn't get any pictures), then I wore it to see some Burlesque, and got some pretty poor pictures on the street. Finally I intended to wear it to the Rockabilly Rave this weekend, and seen as my hair finally submitted I had a couple of minutes to take a few snaps!


Speaking of hair, this was my first attempt at a foam roller wet set (I attempted a pin curl set once before), which I decided to attempt at 12am the night before. Clever. My hair scared the crap out of me when I took out the rollers, but I got somewhere in the end! To be honest, I was glad it ended up being dry enough to work with. 


The bodice is the Betty bodice from Sew Over it. I made a small adjustment this time, and took a wedge out of the centre front, which has helped a lot. I used the all-in-one facing again, which I love, but I didn't find their method of sewing the shoulders very easy last time so I used the method of pulling the back through the shoulder to turn it the right way out.


For the skirt I replicated the pleating of my favourite pink vintage dress. It took almost the full width of the fabric front and back. I just really like how it sits, and how the fullness feels, without being as difficult to wrangle as a circle skirt. As soon as I put it on I was delighted! It felt so comfortable and I was twirling around the living room. ironically the belt from that dress is a perfect match. It's about a 7mm knife pleat, which unfortunately hasn't worked at all with the next fabric I tried it with, which has way too much body.


The fabric is of course from the Hemmingway collection. I, of course, bought it in my John Lewis Post-Christmas binge. You know, to differentiate from my New York binge, my Paris binge, my Cloth House binge.....

I also have it in the yellow & white and pink & green colourways, which is nice! What to do with those? I need to make a few nice simple Summer dresses (you know, for when the weather gets warm, if that ever happens).


I must add, that this fabric was amazing to sew with. It never creased during the sewing of it, at all - and I definitely wasn't being careful!. I can't fault it!

One thing you have to keep an eye on, however, is the concentration of flowers. They are pretty random, but they do have more concentrated areas. The first time I pleated the skirt, they ended up being even more densely populated right beneath the waist seam. It looked ridiculous and I had to trim off the top inch or so and re-attach to the bodice. Careful now!


I pinked all the seams, but beware! Take care with pinking shears, as they can be as dangerous to your garments as an overlocker is. I managed to catch the back bodice in my shears and with one fell 'snip' I had two baby holes. Fantastic.


It was sort of a 'well that was bound to happen' moment. I tried to back it, and satin stitch it initially, but it was too much for the fabric and was art of destroying the holes even further. So I found the exact section on a scrap piece of fabric, cut a bigger hole and patched it from behind, stitching along all the black lines I could.


I also applied fray check and to be honest it's hardly noticeable. The darkness in the picture above was before the fray-check had dried. It's just our little secret now. Now I treat pinking shears with the respect they deserve!

So what's been your worst dressmaking error?
Ever cut a hole in an almost finished dress?

Emmie x


Tips 'n' Tricks - The Dreaded Waist Gape

Sunday, 7 June 2015


Hey Guys,

We're all familiar with the problem. We all love a shirt dress, but there's always something haunting you in the background.

Waist Gape.

No matter what you do, no matter how you place your buttons, it's always there. You might try on your beautiful shirt dress and think, 'Wow, I've escaped!!'. But wait, you haven't sat down yet. You fool!


You might think, 'well I'll just have to wear a belt with it'. You may even attempt to put a hook and eye in, if you can handle the frustration. I always find they're never in the spot I meant them to be, and they cause a stand off gap.

But there's another way. And it's so easy you are going to groan out loud.


This of course is my Sew Over It 'Vintage Shirt Dress' that I blogged earlier last week. I didn't follow their button plan, as I wanted teeny buttons, so I followed what felt right to prevent the dreaded boob gape (this trick would also work a treat for that problem too btw). If I remember correctly, my spacing was 5cm centre to centre, and spaced evenly either side of the waistband.


What's that?

Where is the gape?? I HAVE SOLD MY SOUL TO THE DEVIL!!

No, not really. He ain't got the goods.


It's just a button. 

A backwards button. 

A belly button, if you will. 


What a sewing epiphany!! I just put an inward facing button between the waist buttons. And it doesn't interfere if you want to wear a belt which is awesome. And it doesn't cause any pull or drag lines. Simples.


Who's groaning? Who's kicking themselves?

I, for one, am very happy to know my waist gape is over!

Emmie xx


Happy on a Bed of Roses - Sew Over It - Vintage Shirt Dress

Wednesday, 3 June 2015


Hey Guys and Gals,

Well I know FOR SURE this dress must have popping up at some point on your feed today, but I thought I'd poke my head into the circle and show you mine too!


If you haven't been reading your feed today, this is the latest pattern release from the girls over at Sew Over It, The Vintage Shirt Dress. I have been eyeing this dress up since last Summer, when I saw the shop sample of this dress on a mannequin in the corner. Of course it started it's life as a class at Sew Over It, which of course they still run (Lisa is actually wearing the sample on the class page!). I knew it was going to be a pattern eventually so I had to bide my time! Although the girls have produced a sleeveless version for the pattern release which I'm so happy about.


I helped the girls by testing the pattern a couple of months ago, and I got this lovely blue floral cotton to whip it up. Unfortunately, I think they kept me the last scrap, but there's definitely lots and lots of beautiful stuff in their shop, and I sure as hell had a hard time choosing! I think I would also have loved one of the blossom prints that Lisa used for a Betty recently. You know I love a blossom (seen as my leg is painted in them!).


I didn't attempt any pattern matching, I don't think it's worth it for a print like this! In terms of the pattern, you know I like my skirts long (and if you remember I did that massive hem) so I think I added a lot of length. But that's the easiest adjustment in the world so there were no problems there.


I wore this first to the Imperial War Museum for the Fashion on the Ration exhibition (where apparently Amy (AlmondRock) wanted to rip it off my back haha).


I don't know that I followed the button placement, to be honest I did them all on the morning of the exibition so I did what looked right for me. It was my first time doing them on my machine - the buttons I mean! But I didn't have the right foot, and I made the rookie mistake of not leaving long tails to secure them. I've caught a few falling off since, lol! How and ever, I did really enjoy doing them on the machine, so I'm definitely going to do it again in the future. Just properly next time.


I'm really proud of my armholes. I used my new edgestitch foot and they turned out beautiful! One side didn't even get those weird ripples you sometimes get with bound armholes!! The other did though - no cooperation.


The dress is super comfy. Next time I might give myself a smidge more in the bust. ASIDE: if you worked with me, you would know that I completely overuse the word 'smidge'. It's quite funny, we all have our own catchphrases at work. I know it's a word and not a phrase, but that is definitely one of mine!


I'm actually really proud of how my collar and lapel turned out. I was really lacking in confidence that I could achieve a good result, but I did! I've begun to think collars are my nemesis but I took my time over it and it worked out well. There was something else that worked out particularly well that came to me in a sewing epiphany - I'll share that with you guys later in the week!


My skirt is almost the complete fullness. My fabric was a little on the narrow side (and of course making it longer made the flare wider) so I needed to compromise a smidge (there! see!).


I feel like I might want one more button. I ended up putting an extra one on while I was wearing it the first morning haha. Talk about cutting corners.


I seem to have accessories coming and going in these photos, but in the one above I'm wearing one of the brooches I've been playing around at making :) Although it hasn't completely sated my love of buying... there's a camp, glittery crocodile winging it's way to me as we speak. MMMMMM GLITTER.... Speaking of glitter, I have spent approximately £25 this week on glitter. Clearly I don't have a car, mortgage or children. Whoops.


Last but not least, if you got this far , I have a few surprises to end this post!

The lovely girls at Sew Over It have offered my a free pattern to offer to one of you lovely readers! To be in with a chance to get a free copy, all you have to do is leave a comment before Saturday 6th June at Midnight GMT. That gives you a few days! If you want to comment but don't want to be entered, let me know!

Oh and if you're not lucky, you can get the pattern for 20% off with the code EMMIE20VSD in the Sew Over it Shop for the next week, until Midnight next Wednesday the 10th :) My first code, how awesome!

I think there are a few other surprises coming from the girls later in the week, so look out for those too!

So what do you guys think? Anyone got the itch to get this under their needle?
Also, Marilla said that the cover art looks like Lisa and I! 
How flattering ;)

Emmie xx


Is Life Under the Sea, Is Better Than Anything They Got Up There?

Friday, 8 May 2015


Hey Dollface,

What have you guys been up to lately? I've been getting caught up in the show 'Bomb Girls', which is based in a WWII bomb factory in Canada. The clothes are amazing, and are giving me loads of inspiration; especially after going to the 'Fashion on the Ration' exhibition with a bunch of Spoolettes a few weeks ago.


Today I bring you one of the latest offerings from Tilly and The Buttons, the Arielle skirt. I tested this pattern for Tilly, so this was made up a while back. There are some cool features in this little skirt, but of course I made some silly mistakes!


The first and most obvious mistake I made was to cut out the front wrong. I gots the overlap the wrong way around. Whoopsie.  
I don't think that matters though! Looks just as good either way to me. I used the remainder of the black cotton twill/drill from my Rigel Bomber. Haven't worn them together yet, haha. It didn't work out too bad, but it crumples like a bitch. Standing room only!


I used some of the awesome anchor buttons I got from the tailor. I think the buttons down the side are a lovely feature.


I was a little worried about using the buttons because they have a deep looped back and I was concerned it may pull on the underlap and possibly rip through the fabric over time, so I faced them with some green cat eye buttons from the stash.


It really worked a treat. They feel super secure now and they sit great. As well as ripping through, I was concerned they might distort how the underlap would sit but no problems now!


I started off making the full length version, but I realised I was a bit short in the wonky piece of fabric I had left. And seeing as I was at sewing club without any other project, I had to make do! I've never been left with such tiny scraps of fabric. So I think this ended up about 7cm shorter than full length. Another mistake by Emmie! But I seem to have this fluke of accidentally hemming things to the right length. So YAY mistake!


CHEESE!!


So all in all, a nice black skirt! Nothing as awesome as Tilly's promo pictures though - I love them! The way the colours pop is so amazing. Nothing bad about a wardrobe staple though.


So plans for the weekend... I am having a wardroble clear out. Like a serious one. I promise I am. 
I'm seriously sick of opening a wardrobe full to bursting and not being interested in anything I see. I've been hoarding clothes for a stupidly long time. You will see me on an episode of 'The Hoarder Next Door' at some point in the future. Sitting, waiting for the avalanche in the middle of a precariously filled room.


And here, as a little outtake treat, is my favourite broken doll photo from the set :) What is going on with my legs? Crackerjack


So, how are you guys feeling about your wardrobes these days? Are you finding they're coming together or falling apart?

Emmie xx

Going Deep... Hems

Monday, 6 April 2015


Hi Guys,

Today I'm pondering a question... Why do people hate on topstitched hems? I've done handstitched and topstitiched and to be honest, I lean towards topstitched more often than not. And somehow I feel bad for it!

To be honest, I like how they look. I just do. And as neat as my handstitching is, I don't trust it's longevity. Stitches are going to pop! And sometimes handstitching doesn't feel as secure as I would like, especially for a really deep hem. Herringbone or Slipstitch - it doesn't matter. It's feels all the same to me.

I was sewing this dress this weekend, and I really tossed and turned about the hem. Should I - Shouldn't I?

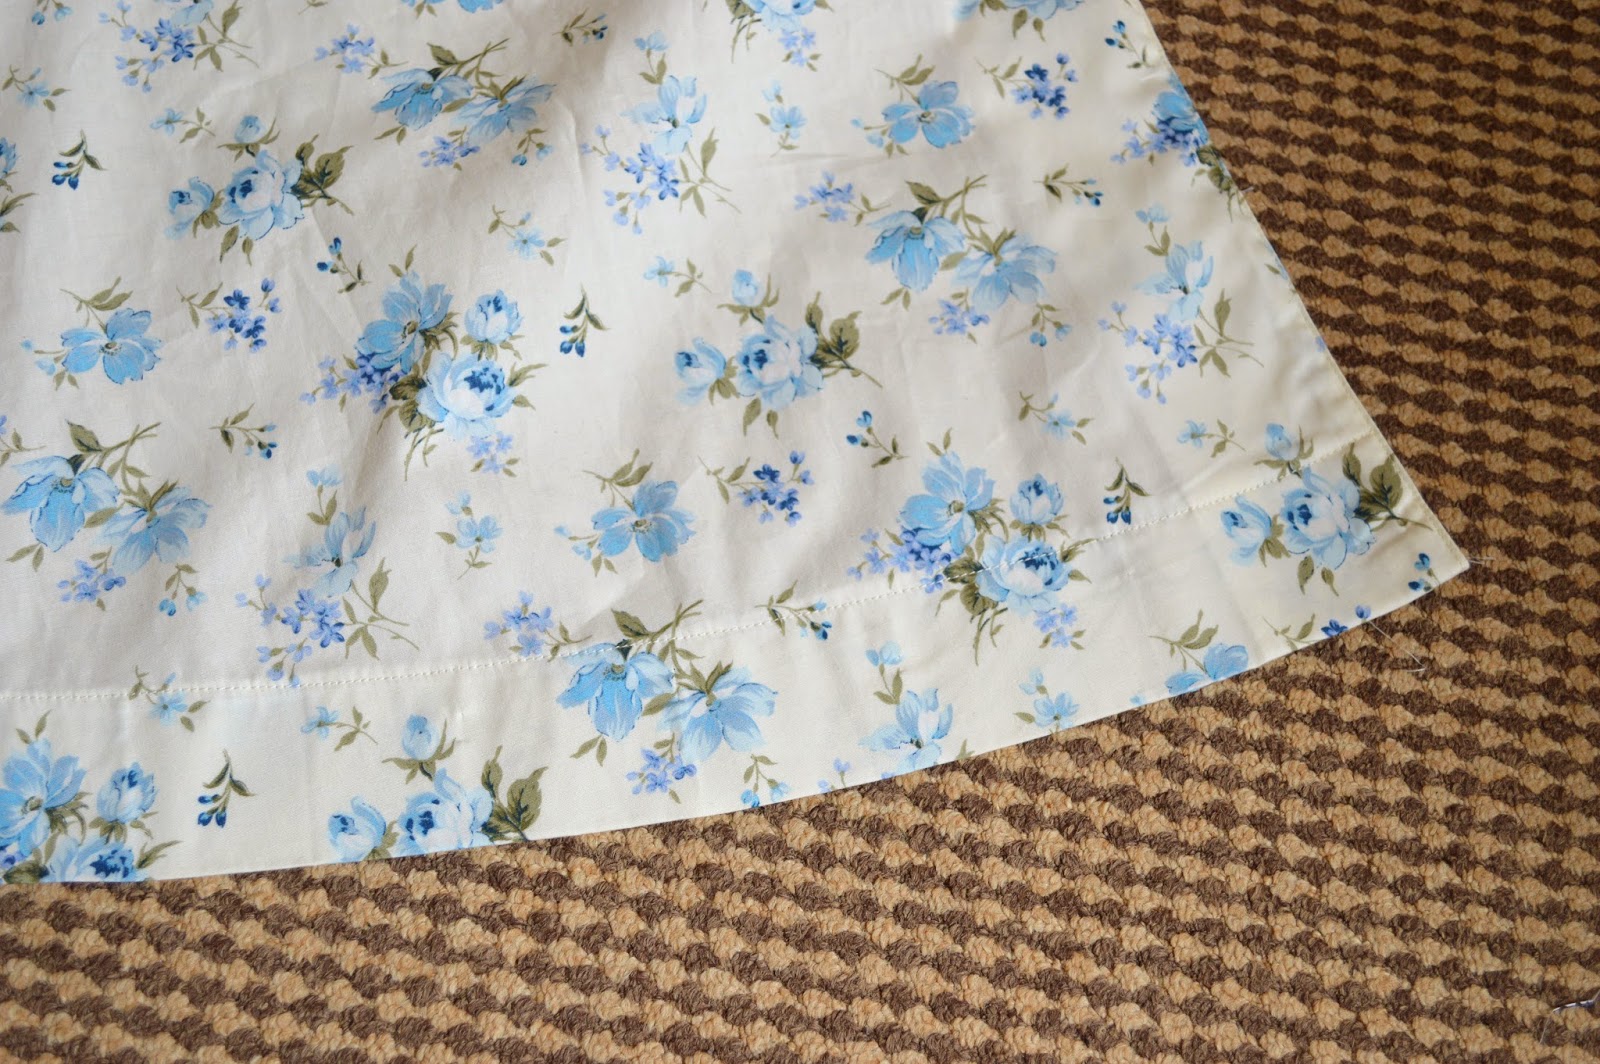
In the end I decided that I quite liked the definition the topstitching would bring, so I topstitched it. And I did it at the deep 4.5cm end of the hem. And I really like it!

I had eased the fabric slightly with the overlocking. I also made tiny pleats that I pinned in place to ease the excess as I pinned the hem up. I pressed it all in place and then topstitched from the outside. From the inside the pleats are visible but from the outside it looks lovely and smooth.


Now I'm not saying I would topstitch in every circumstance. I would sway more to handstitching for armholes and necklines where possible; and in a different colour or fabric I would still definitely consider it on a case by case basis, even after liking this version.

I just feel that topstitching a hem is nothing to be ashamed of! Let the topstitching roam free!!


How do you guys feel?

Emmie xx


They're Just Popping Out!!

Monday, 2 March 2015


Hey Guys!

So the flavour of my month was babies, babies, babies! I haven't really made the effort to make any handmade baby gifts until now. To be honest, I've only had a couple of friends have babies in the past few years, and they were born way back at the start of my sewing journey. But it seems babies are like buses, and now they're coming thick and fast!


I've been working far too slowly on this Lua sleep sack for quite a while. But the beneficiary made his debut in the wee hours of Saturday morning, so I got off my bum and finished it. To be honest it's not an especially time consuming project - I just kept questioning my choices of fabric and pattern size.


The boy put doubt in my mind about the fabric combination. I personally like it! The galaxy fabric is a Robert Kaufman called Stargazers Galaxy Royal. I picked it up at Frumble Fabrics thanks to some helpful Twitter suggestions (By the way, their postage is obscenely cheap and it arrived really fast). I really wanted something space related as the Dad is really into astronomy :) The lining I picked up in A1 fabrics on Goldhawk road but I've seen it elsewhere. I've seen it in some other colourways too. Thankfully that was a stashbust from the remnant left over from my sister's Tofino pajamas a couple of Christmases ago. Woohoo!

Thankfully it sways towards the boy spectrum but I know my friends would have been happy with it for a girl too. I was actually convinced they were going to have a girl so I was surprised with the announcement! I house-shared with the baby's Dad for two and a half years; and the baby's nursery is actually my old room!


I made a few changes to the pattern, firstly making it a bit smaller. It's a bit scary looking when you first cut it out! It looks ginormous for a 0-6m baby. I shortened it by a few inches and there was plenty in 1m of fabric. I also mistakenly sewed the armholes with a 1.5cm seam allowance instead of 1cm which I didn't think was too big of a deal. I also deepened this to 2cm on the inside neck, which I had always intended to, as I thought the straps looked very close to the babies faces in the samples.


Sewing on the buttons was interesting. I found these in my stash, and I thought they looked dreamy! The pattern has you stitch them on 3 separate times, with extended tails that are knotted excessively and sewn back into the sack. I don't think these buttons are going to become a choking hazard (fingers crossed!).


My invisible side zip went in so well, thanks to my new invisible zip foot! The boy treated me for my birthday - yes it was over £30 but it's definitely the best one I've ever used. Bernina is definitely £££! I found my zip to be quite stiff intermittently so I really hope it doesn't break!! Good colour match though!


I really hope they like the sack, and they get use out of it. At the moment I'm waiting for them to get home so I can have baby cuddles!! Walking the fine line of showing interest but not being too pushy!!


My other gift, you may have already have spotted! It was for Clare from Sew Dixie Lou, who is yet to pop ( I think?? It could be happening as I type!). I was having quite the panic about what to make for Clare, as so many other Spoolettes were going to be making goodies, and of course you don't want to make the same as someone else if you can help it! I had some good ideas but it was the execution and time limit that forced me to veto them.

Background story: I remembered that Clare had a denim jacket she wore to a Rock Festival in Canada that she had decorated with patches. And of course a denim jacket is one half of a Canadian Tuxedo. And seen as the baby will be half Canadian..... Well you catch my drift.

So here's what I came up with: (photo's borrowed from Clare!)


The jacket I bought (I did not have time for making a Denim Jacket!!). I picked up a TCB lightening bolt patch from the US to tie in with Clare's Jacket, to tie in with her love for Elvis and to tie in with a tattoo that Clare had spoken about in the past. On the inside of the back yoke, I sewed in the fabric that Clare used to make her Betty Bacteria dress at the John Lewis Sewing Bee last year - which was a special day we all shared together.

On the back:


I used a heavy chain stitch to embroider 'Spoolette' on the back yolk so that little Miss. Szabo would feel included from Day 1! I was really happy about the result but I wish I had had time to make the jacket too!

I can't wait to meet them both!!

Emmie
Made With Love By The Dutch Lady Designs