Showing posts with label Elisalex. Show all posts

Lost in a Flower Bed...

Tuesday, 6 May 2014


Hey Guys!

The next on the Vegas line up is my Floral Elisalex :)
This is my first Elisalex with sleeves, and I really love them! 
I had already worked on the bodice fit before, with my Gingham version, so I was confident about that part.
For the skirt I drafted a circle skirt, for a bit of that 50's swing :)


The fabric is a floral Piqué - sort of a waffle textured woven. I found it on Goldhawk road, in one of their 5m lengths. It was in the pile with all of the stretch cottons, and I fell for it. There was a wobbly moment when I was about to start this dress - I think it was possibly the cream background - I was nervous about how it would look against my skin but I'm glad I pushed through now!

I'm like a broken record in that respect.


These photo's were taken before we went on holiday, I was trying out different jewellery and hair flowers. I had bought a range of bits and pieces on eBay, including the Lucite bangle and necklace.


I had intended for the dress to be a night outfit, but everything got reshuffled and I wore it in the day on Friday. 


The one thing I noticed after I took these photo's, was that the hem of the skirt had fallen and was wonky as hell. And I mean WONKY. I seriously can't believe how much a hem can fall on the bias. We're talking like well over an inch. I think it was getting close to two in places (although my addled brain may not be right).


I put in a lapped zipper, I think this one was actually my first, and it went in well, but I think I redid it once. It wasn't quite covering the zip enough for my liking. I think I will consider putting a hook and eye at the waist seam in future, as that's where the extra tension is, that pulls the fabric away from the zip.
This zip wasn't handpicked, but I did get some metal zippers for my Vegas dresses to give them a bit of extra special specialness :)


I really like how it looks here with the petticoat here, but after I redid the hem, it was just too short for this petticoat. I used to like the peeking petticoat look, but either I changed my mind, or I only like them under certain dresses. I think perhaps if the fabric was heavier, or held its own shape more it may have been okay.


I decided to see how it would look out on that dancefloor - you know, the one I never made it out on.
But you know, we gave the lessons a go. With a tonne of other people, so it was difficult to see the instructor. Unfortunately, I'm an eager learner, and Mr.G is a careful learner and we learn at different rates. Which leads to frustration on both sides! We have bought some learner DVDs so hopefully we will be experts by the time we get back there.

Which leads me to my favourite picture of all!


I also really like those shoes, but they are just a smidgen too small. It was one of those situations where you are find the first pair in your size, and the next colour in the size up, and then the bigger size end up being a hell of a lot more comfortable! I hate when that happens, as I am sort of between sizes but I don't like sizing up if I can help it. With the ankle strap I probably could have afforded to. Oh well.

I'll leave you with a pic of how I wore it on the day :)


Almost the same, but new sandals and a different flower :)
Unfortunately we left the good camera at home by accident (we did remember to pack the charger!) so I have to apologise for some of the Vegas photo quality!

Emmie xx

The Oz Dress - Elisalex FBA complete!

Sunday, 15 September 2013


Hi Guys!

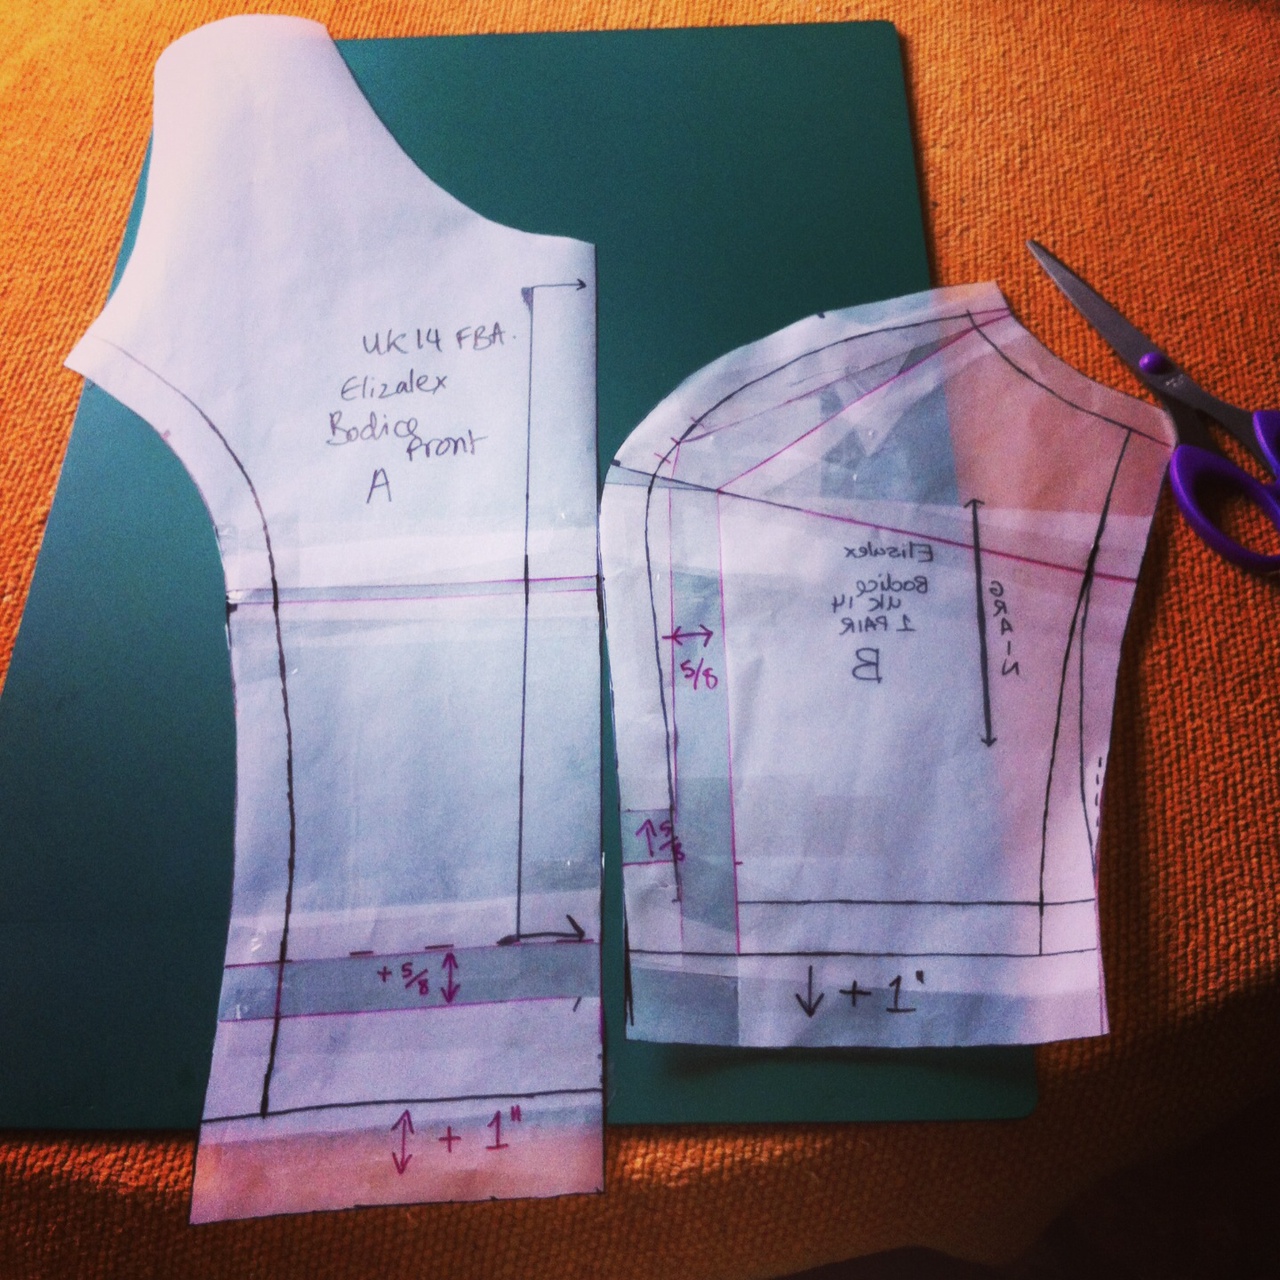
I finally (FINALLY) finished my attempt at an Elisalex bodice with a full bust adjustment.
It's been a long time coming, as there were a few delays along the way, but I did post some progress pictures along the way on Instagram and Twitter.


I knew I definitely needed to adjust the bodice when I finished my last Elisalex.
 It fit, but it didn't fit the way it should! I definitely had the "Squished VonBoobies" look. I followed the FBA instructions written up by Elisalex (and by this point I actually understood them!), and did a 5/8" FBA, with another inch added to the bodice length (although next time I think I'll do 1.5"). I think I gave myself a tiny bit extra in the bust than my measurement just for comfort.

But with this comparison photo, even with the bodice just pinned together you can definitely see the improvement! Much more room, and the girls are much perkier, I'm sure you'll agree! The fabric is a blue Gingham (probably polycotton) I got at a market in Rye.


So what happened next was Delay 1. Which I think was pre-washing my lining. But that was easily fixed once I actually put it in the washing machine. Clever, eh?

Once I had the bodice lined I had to attach the gathered skirt FROM HELL.
I put the whole thing together, and then found loads of bits of the skirt that had caught up into the seam. 
Argh!
Then, upon rectifying each individual bit, I managed to catch other different bits. And upon fixing those I caught other bits. By the time I finished the skirt, with no bits caught up I was fit to go into the garden and set the whole thing alight.

And so Delay 2 happened. Wherein the half-finished dress sat on my dressform for weeks. I did at some point manage to cut out some lining to line the skirt, as I realised it was indecently see-through.

Then it sat there for another while, until I decided to bite the bullet and put the zip in. And I even took the time to hand-baste it first, although really it doesn't take that long at all!

And then yesterday I decided to knuckle down and get it finished before I died of old age.

And to be honest I actually love the stupid thing.


And I'm using my fancy new tripod that Mr.G bought me. It's super cool and I got to use my wireless remote! I used most of the width of the fabric for the skirt and I managed to somehow get the length I had wanted all along! The bodice length does actually look and feel good, but I think I only did a 1cm seam on the bodice/skirt as I knew I needed all the length I could get. Still might add a little more next time so I can do a full seam allowance.


Since taking this picture, I have realised how much lower my right shoulder is.
And this was me trying to not look so wonky! Although I feel stupid saying that with my wonky crossed legs.


I really can't believe how perfect the fit is. I'm definitely gonna be using these pieces as my Princess Seam Block now, and playing with neckline and back variations. But I doubt I will be doing another gathered skirt anytime soon.

I am, however, pretty happy with the skirt in general. It doesn't make me look AS big as I thought it might. I do look quite hip-py, although most of that is actually hip. My hips pop out almost straight after my waist.

The stitching on the hem wasn't my best, as I was more focused on (a) trying to get all the white stitching in the white line of boxes and (b) trying to keep the edge of the skirt a blue box. But at least I managed those two things!


I do however think my next couple of makes are not going to be fully lined, as I want a few nice quick makes! But it does look good. And it was definitely necessary for this fabric. I do however want to escape to the land of folded hems and bias bound hems for a bit. I'll avoid facing-land if I can.


The dress kind of makes me feel like a cross between Dorothy (Damn should've worn my red heels!) and a ballet dancer. And I secretly used to prance around when I was younger (until not that much younger), pretending I was one. So, for your pleasure, some ballet style posing :)


And that's it! I wore it to dinner last night, and it was lovely and comfortable, so I know it will get plenty of wear! Although it may have to wait until the weather is nicer...

I'll leave you with a final pic of me with my regular grumpy.resting.face


LYLT,

Emmie x


Made With Love By The Dutch Lady Designs