Who likes SHORT-SHORTS?? Rite of Spring Shorts - Papercut Patterns

Sunday, 23 March 2014


Hey Guys,

(You've been getting the vintage - now here's a peek of the ink, haha)

I'm gonna start drip-feeding you my holiday wardrobe as I do the finishing touches :)

This may be a part of my Holiday wardrobe, but I'm still as of yet undecided...

These are the Rite of Spring shorts by Papercut Patterns. I've been dreaming of these shorts ever since Lauren over at Lladybird made them, and I've been perving on that blog post ever since! There may have even been communal perving with Clare over cocktails, haha


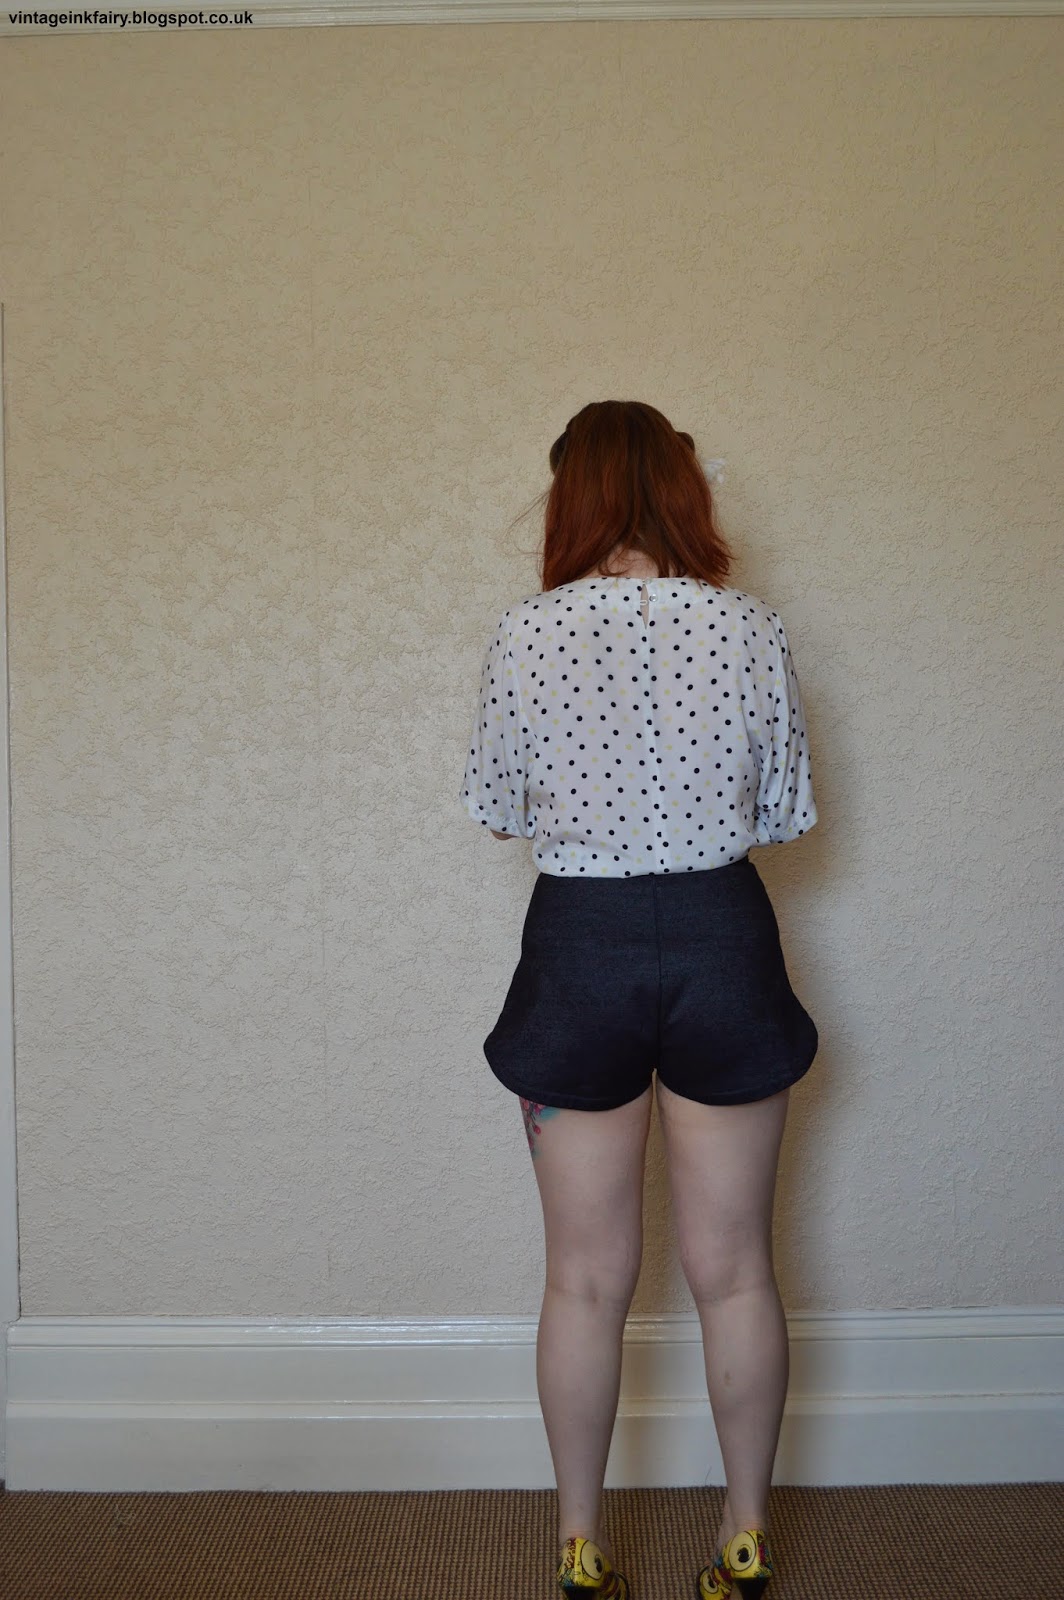
I do want to state now, that as much as I am unsure about this particular pair of shorts, I still love the pattern. I want to show off the pattern in it's best light so I have chosen the most flattering photo's to begin with (but I will show you my issues at the end).


Weird bum crease, eh? I had zip issues so its either that or I'm photo tensing, haha

Now I'll explain to you my reasoning behind whether they are going to come to the US with me.

By the way, this is my first time using piping, and I LOVE IT.


I used this as my wearable muslin, and used a heavy Denim that I had gathering dust in the form of my first solo-skirt. Now, the pattern does specifically say not to use anything to heavy, but I figured, in my infinite wisdom, that something heavy would hold me together a bit better. The only thing I try to disguise is my stomach, and I thought something light would cling quite badly.


(Lots of Bum coverage)

Turns out that heavy denim doesn't quite work. Turns out it isn't the most comfortable thing to wear in the form of this sort of pattern. Especially with such a bulky crotch seam! And turns out it doesn't disguise an unflat stomach as much as I would have hoped. 


Also, I need to ask you guys - I know nothing about crotch curves. Or crotches in general. Is there any way that you can avoid creases at the crotch if your thighs meet in the middle (as opposed to having a thigh gap).
I have no issue with my thighs, but it is one of the reasons that I very rarely wear trousers in general. 
Camel-toe is not a flattering look on anyone.

I will show you some photo's that begin to explain my unflattering predicament (but bear in mind are no where near the most horrendous ones I took)


TUMMY HUGGING


TUMMY HUGGING THIGH TOUCH CROTCH CREASE

So... help?

I'm going to try it out in a stretch cotton that I have. It has stretch and a tropical print, so may help with the tummy disguising? Thoughts?

Is there some sort of crotch curve adjustment that would help?

Or should I just buy some control pants and walk around like a cowboy?


Emmie x


Vintage Midnight Swing Dress - Vintage Butterick B6158

Friday, 21 March 2014


Hey Guys,

I present to you the recent bane of my life - Vintage Butterick 6158. 


Incredible pattern, eh?? I adore that red one.

I didn't make an official vintage pledge this year, but I hope to use at least 3 - so here's the first :)


This is my newest make for the Minerva Crafts blogger network. I used a Navy Blue Bengaline stretch suiting to make this dress. I chose the fabric because when I looked at the tags of some of my vintage reproduction dresses, they all were all made of Bengaline so I said I would give it  a go!


Working with this fabric was interesting. It doesn't crease easily, which is handy, but is difficult to press seams out flat. Almost a bit spongy and boingy. My iron is not exactly up to scratch at the best of time anyway so it may work better with a bit more steam power. A new iron is on the cards soon!

I made a muslin of the bodice, which was a good fit - I only added an inch to the back seam (which I had in fact added when I measured the pattern. Unfortunately, I hadn't factored in the number of seams/darts, etc in the bodice, and the thickness of the fabric. In total there are 7 seams/darts and also the front fold over! The bulk of all those seams made the bodice way too small.

Gutting!

I had to taper out most of the seams to even squeeze in, so I am going to have to be careful not to put on weight before I need to wear it!! In fact I'm shocked that I managed to fit the bodice into the skirt in the end, as I didn't keep a close track of their respective circumferences. There was a reasonable amount of easing to be done with about 1200 pins!


I will definitely not be rushing into this dress again, as it was pretty tricky in many places, but I definitely learned some things, and you gotta challenge yourself sometimes. One of the trickiest bits was the upper bodice curves, which have mini-pockets behind the curve like the popped skirt pockets do. I'm not sure I can even explain how it goes together. The hardest part was having to clip into the point, turning it under and topstitching all around. There ends up being nothing to turn under at the tip of the clipping, so its bloody hard to get a good finish!

The other tricky bit was the side zip, never before have I attempted one. It was a bit of a haphazard attempt, but it worked out semi reasonably in the end, so all's well that ends well. It was almost the last thing I did in the dress (as per pattern instruction I may add - and then all I got in the instructions was "insert slide fastening". Thanks pattern. Thanks FOR NOTHING)

And as well as it turned out in the end ("well" used loosely here) I do still despise side zips.

My body doesn't suit them - I need to use safety pins to hold the zip close together to get it up! I have always had issues with side zips. Maybe its because I have such a steep curve from waist to hip and then back out to ribcage. It's the only thing I can think of!


The buttons were vintage buttons from my stash, and I really love them. I used the gold version on my sister's Christmas skirt. I'm sad that they are gone! I can't even remember where I picked them up, I went on a button rampage a little while back.


I had to chop about 5 inches off the bottom of the skirt, and when I hemmed it, it was tricky (again?? who'dve thunk it), as it was more curved than it looks, and not as full as the front drawing depicts. After I had stitched it, some of the hem had that warped look about it where the curve couldn't fold flat.

To deal with this I basically gave it a second row of stitching below the first row which worked out dandy - I will definitely employ this method in the future! Flattened out all the silly warping and looks like a twin needle.


I'm don't think the sleeves are supposed to be so curved out but the fabric has a lot of body - and a decent amount of stretch too I might add (although the way it all worked out, I didn't have the stretch direction around my waist - mores the pity. Will definitely take more factors into account next time I lay out my pattern pieces.


This is me trying to show the width of the skirt, haha

Oh and I used most of the 4m of fabric for this pattern - the most I've ever used! Granted I could've lost 5-6 inches off each skirt piece, but I didn't think to measure at the time.


Either way I've come full circle with this dress. I didn't feel much for it during the make but it's definitely growing on me now! Of course my kit is available for anyone who wants to give Bengaline a go!

And to reward you for your reading, I will include the photo's I found amusing when I flicked through what I took

Pop ya collar, eh?


LYLT

Emmie x


Chop Chop

Monday, 10 March 2014


Hellooo Everybody,

Sorry it's been quiet round these parts recently. I am up to my eyeballs in half finished dresses!!

I am sewing for Vegas right now - I'll give you the rundown of the current wardrobe at the moment - 

A tropical circle skirt - awaiting a buttonhole, button and hem

A sweetheart neckline top - awaiting strap attachment (already sewn up)

A pair of shorts - awaiting buttonhole and button

A floral heavy cotton sleeved Elisalex with a circle skirt - awaiting zip

A teal Duchess Satin Anna with a circle skirt - awaiting most parts. It's currently overlocked and darts and pleats are sewn.

A vintage pattern in Navy Bengaline (My latest Minerva Network make; It's almost done, but I am running late as I was ill recently - I'm sorry Vicki, I swear it's almost there!) I hope to have it finished by the weekend, my major hurdle was the buttonholes, but they are done now so awaiting bodice/skirt attachment, sleeve hem, skirt hem and side zip. I think I'll have to shorten the skirt too I think. Sounds like a lot, but it comes together so fast!

A pair of navy Bengaline shorts - cut out

A blue circle skirt - cut out


Sewing for this holiday may kill me but I'll be damned if I don't do my utmost!

I actually have more plans (mainly more circle skirts - which I think are achievable, and a couple of blouses that I'm not sure are)

I do have 4 weeks left, so if I just chip away every evening at something small (which I have been doing) then I think I'll manage it. I don't have weekend plans, and I have 1 days annual leave and a lieu day I can take if I need it.

It's so bizarre, I can spend so much time avoiding starting things mid-week, I used to feel that I needed an entire day alocated before I could focus. However, I have found that if I just pick it up when I'm sitting watching TV I can achieve marvelous things!

I was sitting in front of the TV the other night and I had a whole bodice pinned together before I knew it! Or handstitching a neckline, or cutting out a skirt, or drafting a pattern piece. I have to feed it to myself in bite-sized chunks!


OK so back to the reason I started this post!! I might have done something...


I'm not sure if you will twig instantly, but these are the sleeves of my Christmas dress.

Basically, I have never been happy with these sleeves. They were massive on me, and as much as I love those plackets, I'm not sure I can make them work without taking the whole thing apart. 

So I'm sort of at an impasse - take them apart and make them fit, or make the dress sleeveless?

I'm currently leaning towards sleeveless. (sniff, plackets, I'll miss showing you off...)

Further to this, I have been aware of people talking about making sleeved dress sleeveless recently (and vice-versa), and what to do about the extra ease in the armscye needed for sleeves.

For those who haven't noticed these little snippets or, who haven't the foggiest what I'm yapping on about - a sleeveless dress has a very fitted armhole, but a sleeved dress has more ease around the armhole so that you can move your arm around when it's in the sleeve. Otherwise you'd be walking around with your arms stuck to your sides all day :)

Well, in that vein, the blouse I have been considering making for the holiday is this one -


And what did I find on the pattern pieces, but different stitching lines for the sleeved and sleeveless versions!


Here's a closer look!


It might be difficult to see so I'll blow it up once more


The pattern shows all of the stitching lines at 5/8" inside the pattern, and the sleeveless version tapers more out of the armscye at both the shoulder and underarm. The normal line are the strong longer dash lines, and the alteration is the thin dashed line.

This pattern really helped me to see what changes you would need to make for a sleeved/sleeveless pattern to redraft it.

It is something I will take into other patterns with me - and with the red dress if I decide to leave off the sleeves forever. The whole thing is a little big really. Argh, I hate taking things apart!

Has anyone ever made this alteration before? Or seen anything on a vintage pattern that opened up your eyes??

LYLT,

Emmie xx


Made With Love By The Dutch Lady Designs