Showing posts with label blouse. Show all posts

Late night sewing... Mae Blouse - Bluegingerdoll

Saturday, 12 October 2013


Hi Guys,

I finished the third attempt at my Mae blouse! Yes THIRD.
Let me take you on a journey...

The first attempt was with sewable tracing paper. 
I traced between the size that suited my "finished garment" measurements and the next size up, but it wouldn't even close. This surprised me, as I know the patterns are drafted for a D (I know I'm an E but I thought I was gonna be pretty close, I was wrong). I definitely needed some bust adjusting, I wasn't even been able to close it! 


So I decided to follow the sewalong, and do an FBA.
However it went a bit weird in the middle. Let me explain why.

In the sewalong, the first thing you do for an FBA is cut off the sleevey bit. Then you do the FBA and stick the shoulder back on.

Weirdness 1: In the sewalong (illustrated) pictures, it shows a straight edge where you trimmed off the sleeve, even after the FBA. But when you do an FBA you create a side Dart and it ends up kicking out at the side, it doesn't end up straight. I didn't know what to do so i just overlapped the sleeve over the kicked out bit and continued on

Weirdness 2: The side dart created is never mentioned again. I was at a loss as to whether to ignore its existence or sew it up. I thought it would be be baggy and weird if I ignored it, so I sewed it up and trued up the waist/hips. Although I kind of made a balls of measuring them (I forgot to remove the front darts when measuring)

Muslin 2 was done in a lilac cotton sateen lining, that I thought could possibly be wearable, until I cut too short a piece of fabric (although it was still workable) Then I realised that it had a really loose weave (pins were leaving massive holes) and that it was pulling like hell. No No No.

After sewing that up, it closed, but it was SNUG. And getting something to just close is not something to aim for! It was drag-line city.

So I halved the seam allowance and tried again. Close but no cigar.
I drew a whole new seam allowance on the pattern for the next try.

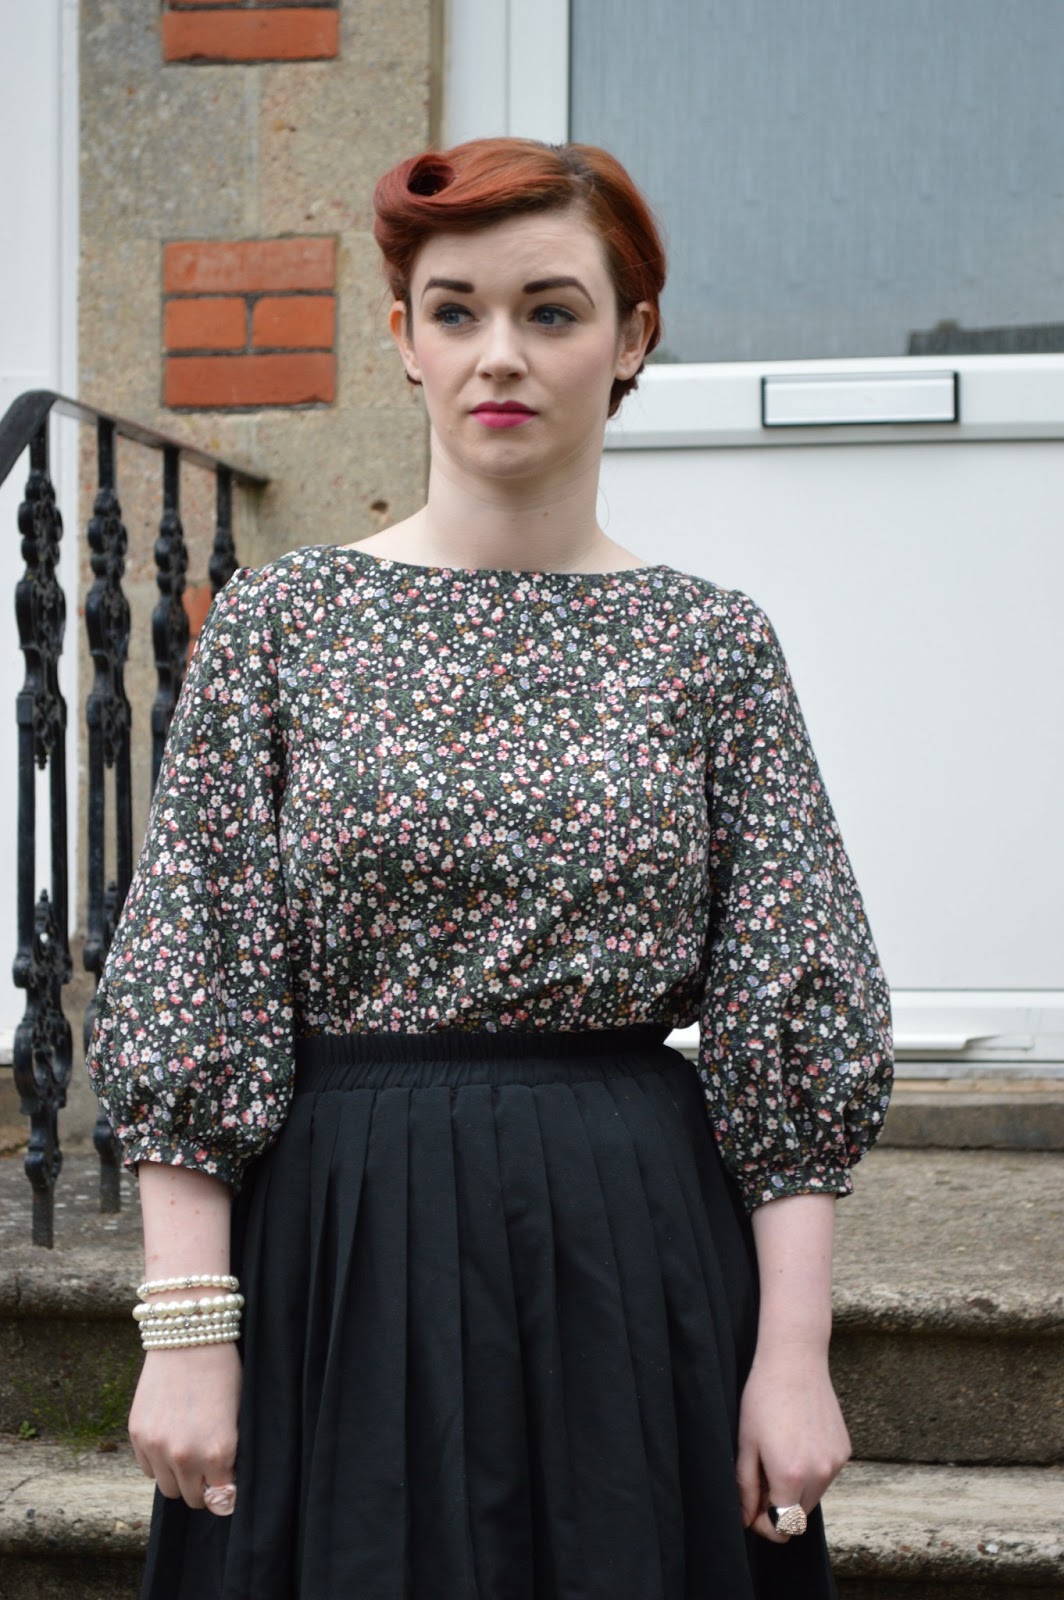
So that brings us to Muslin 3! I made it with something I got at a stash swap. (Thanks to whoever donated!). Not sure what it is, a slub silk or a wannabe slub silk. Either way, its a little stiff, so bear with me in terms of how it crumples instead of drapes. Part of the issue is that my skirt has a smaller waist than the blouse! It looks a lot shinier in these photos too... 

Now in photo one, I am becoming one with the fabric in terms of stiffness. What is with the arms? I look like a puppet on a string. However, let us admire the fact that I found something to match it in my wardrobe! A kilt I got in the Salvation Army. Talk about a 'Fall' Wardrobe, eh?


Although in this photo, I think it looks a little big, it looks better shortly!
I am pretty proud of my finishing. I surprised myself with the scalloped neckline, I thought that was going to be a lot harder. It turned out a lot better than I thought, although Thank God it did because any flaws would be really obvious in this fabric. I used my new overlocker (although it was threaded white, so the insides look a little silly) but I did hand catchstitch all of the hem and sleeve facings! And partially thanks to the stiffness, partially my mad 1.00am sewing skills and partially Mr.G's thread matching capabilities, I think its pretty damn good.


It's like the 1.00am sewing never happened... 
I haven't done the neckline facing. Yet. I'm still not sure if I want to, in case it's too obvious.

In a side note, you can see my crazy eye colour in that top photo!


After the first few photo's, I decided to loosen up and stop looking like such a grump grump.
However, apparently I must raise one eyebrow at all times.


One modification I made to the back was to do the buttonholes vertical instead on horizontal, as I didn't like  the thought of how the buttons would drag off to one side instead of being central in the buttonhole.


I wish that the skirt waist wasn't so snug! Crumple crumple.

I would like to take this opportunity to categorically state that I sewed the buttons on straight and tight, but the buggers prefer to look tipsy, no matter how much I twiddle them. They are vintage buttons that I bought in a vintage shop in Rochester. Thanks for the recommendation Rachel!

All in all I found the pattern pretty straight forward, although I would definitely follow the sewalong, as I found the written/illustrated instructions hard to follow. 
It's probably just how my brain works, but I was stumped in a few places. The hem boggled me so I winged it in the end. I didn't end up doing the second turn either. Ironically I think I understand now, in this exact moment. The photo was the wrong way up for my brain.

But look, I'm still happy with how it turned out! Even my eyebrow agrees


Another version is already in the pipeline. 
Has anyone else noted how ridiculous the concept of a button-back blouse is??
My arms go forward people!

LYLT,

Emmie x

Time for Tilly's Mathilde Blouse!

Saturday, 1 June 2013

Hi everyone!

Just wanted to share my latest make with you all! It's another tester. 
I'm kind of calling them tester's because: 
(a) I have never done some of the skills required
(b) I'm using pretty cheap material to practice with
(c) I want to check the fit before I use nice fabric

But it is completely wearable!!
I do actually have nice fabric about to be dispatched for the real one.

I swear I'll make a non-tester one of these days! I'm trying to figure out what pattern to do next as I type and there is definite non tester fabric hanging on the clothes airer!

Sooo on with the make!


I was sewing Tilly's Mathilde Blouse, which I had been admiring from afar for ages! I thought it would be a good make for me because its a very clean shape and I would learn a lot from it, having never done a blouse, pin-tucks, buttons, buttonholes or sleeves!!

According to the sizing chart, I was a size five. I noted that the size 4 finished garment measurements would also cover my curves so I had a perusal of the maker's gallery and decided that I liked the slightly more fitted blouses, so I decided to bite the bullet and go on the smaller side. 

It took me a while to assemble the pdf pattern (I didn't realise how many pages there would be!). But once it was already to go, I did like how it was nice and stiff and not easily damaged like tissue patterns. 

Cutting out went fine, but I did get confused on the facings, etc, where it said 2+2 (which I now know means 2 fabric and 2 interfacing). I did however panic and cut out 4 fabric pieces initially (imagining some fancy facing with an enclosed seam - like a collar). 

Moving on from there, I had some initial problems doing the pin-tucks. Firstly I didn't look to see how they are formed and I did some completely incorrect pressing which had to be undone. Plus (ignoring Tilly's wise advice) I thought that I could get away with notches on the top and bottom of the tuck and forego the chalk marks.
This moves on to me abandoning the notches and remarking the entire blouse. Picture this happening quite a lot throughout this make. I like to skip ahead and then have to take 4 steps back. I also pinned each pintuck and pressed them before stitching

I'm also not sure as to whether you are supposed to see only the topstitching for the first pin-tuck or see all of them? I can see the first and then bits and pieces of the third - but blame that on my rushed chalkmarks.
I also decided to throw caution to the wind and use a contrast thread for the topstitching to bring out the coral in the fabric. The fabric I got for very cheap in Walthamstow, the buttons came in a green button mixed bag. I think the thread was from the London Meetup.


Everything went smoothly for a while after that, I even did some french seams (another new skill).

I had to do some research, and quite a bit of practice, before I figured out the buttonholes. Even when I decided I was ready, the first one went funny on me and I had to rip it out, which is surprisingly difficult.

Once I had finished the buttonholes I realised they were supposed to be on the other side of the back opening. Whoops. Clearly didn't read the sentence to the end. I did sort of also wing how big they should be and where the button should be placed. There was no real measuring involved, but I'm happy with how they turned out! I think I just need to stitch up the buttonholes a little bit, as one keeps trying to escape, as you can see in the photos. I also have realised I can get it on and off without opening them so i can stitch them as tight as I like.


Now I'm not the best gatherer, I just don't really have the knack. I have problems keeping it tight at either end, although I guess it should fade out into being straight at some point, or I could start the gathers earlier and finish later on the fabric. I think its okay but it could always be better. I also couldn't see when I was supposed to sew up the side seams, but when I was following the online instructions they were sewn up in the pictures when the sleeves went in so I did it just before that!


I'm pretty please with the blouse! I do think that the fabric was a little stiff to make it, a drapier one would definitely be nicer, as the sleeves stay quite puffy when my arms are relaxed!
I'm thinking I might even try it with a short sleeve (like Lauren's in the maker's gallery).
I think that with a plain fabric it will be such an easy item to mix in with my wardrobe. I have so many skirts that I never wear because I literally have only 2 tops that I like. 

Now to settle the age old battle. I like it tucked in, my boyfriend doesn't. 

Who wins??


It's not bad, I just like a bit of waist definition. 


I'll leave you with what is becoming my regular photoshoot outtakes:


I wasn't looking at anything, which is what makes the two faces funnier!

Till next time!

Emmie x


Made With Love By The Dutch Lady Designs