Showing posts with label FBA. Show all posts

Simple Sixties Style...

Friday, 1 November 2013


Hi Guys,


Just wanted to share this Autumnal shift dress with you!


It's not a new make - in fact, it was one of my first! It was actually made back before I started my blog, but it's been languishing in the back of my closet all Summer! I made it in the sewing classes I took, and looking back at it now, I'm still impressed with the quality of the make - CL at The Thrifty Stitcher keep at close eye on us!


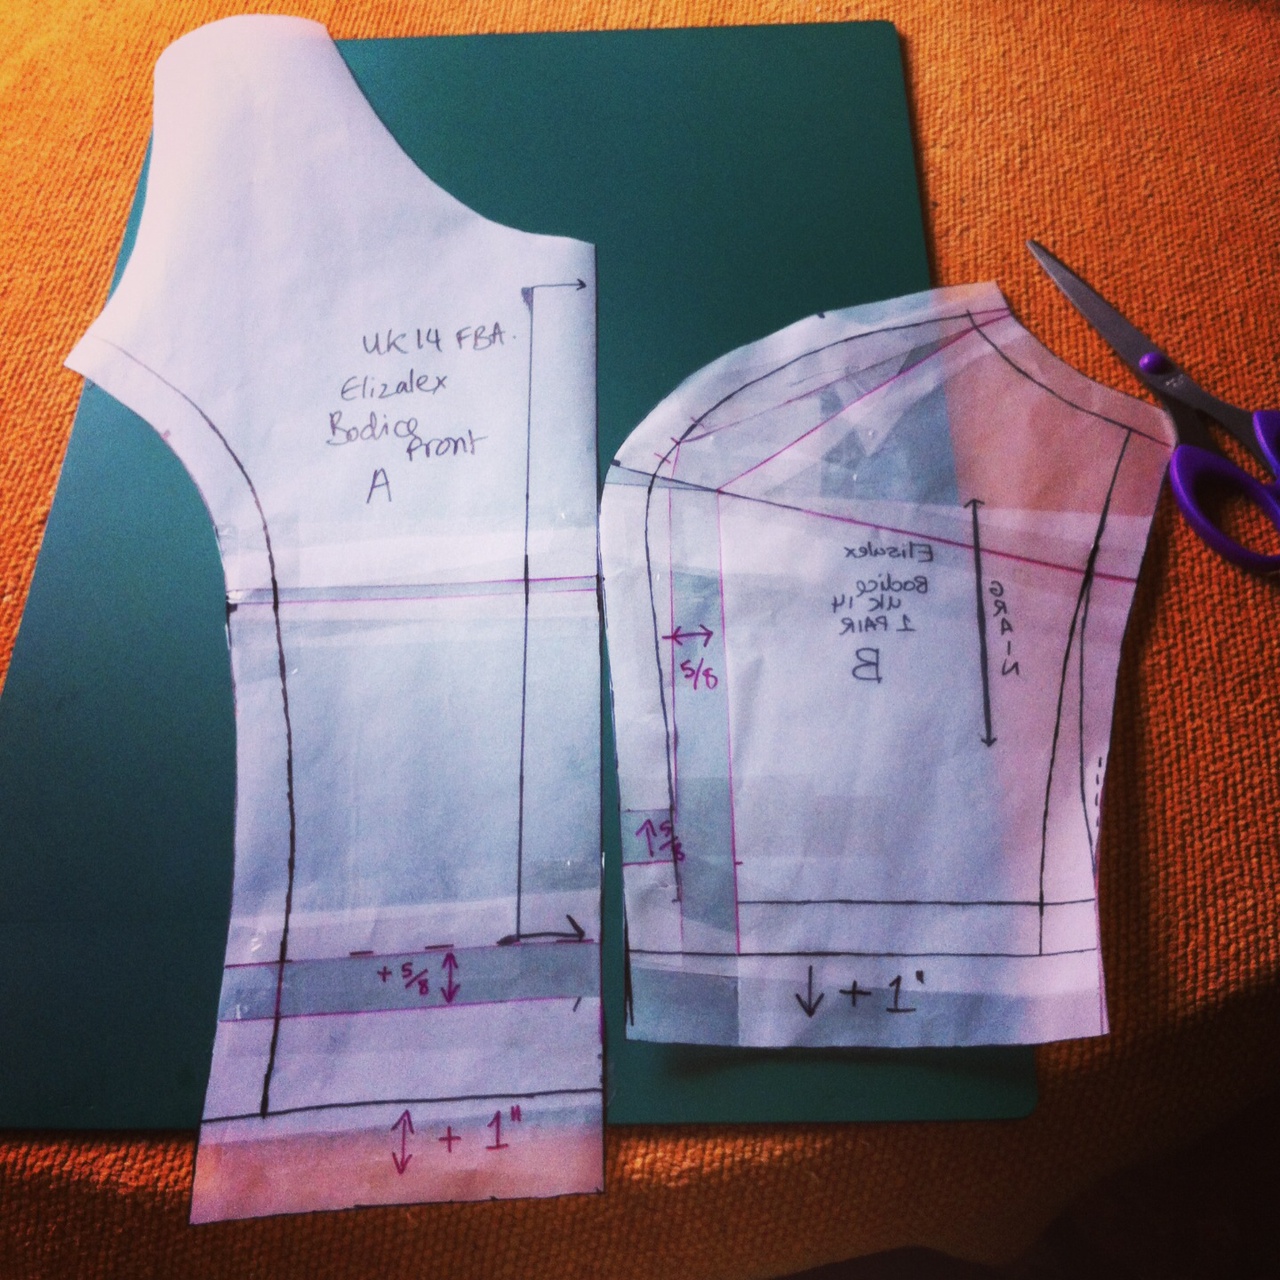
I got the fabric on Goldhawk Rd (of course). It has a lovely weight to it, but it's a lint magnet. Nightmare! It also gets a bit of a shine of you press it to much, so I have to be careful. I lined it with a blue satin, which means that I have no problems wearing it with tights in the winter! We used this McCall's pattern - which looks horrendous, judging by the styling! But its a decent basic block. We were given the pattern, and CL had FBA'ed the pattern on tissue paper before we got there to save time (we were taught how to do it ourselves too). She even transferred my tweaked pattern onto pattern card for me at the end!


Unfortunately, the sixties isn't completely my style, the only way that I really like it is with a cute blouse underneath. The blouse I'm wearing is Jasper Conran (It's actually my interview blouse! and I may need it again soon - eep!). I've been considering shortening the sleeves on a few shirts to get the same look. It can't be to hard, can it?


#


One of the main reasons I feel uncomfortable in it, is the lack of fitting when you look at a side view. 
But I'm not always wandering around taking side photos, so I can usually forget about it! It is the concept of a shift dress - a loose fit. I'm just used to a fitted waistband under the bust.


Although, to be honest, I did actually pick the most flattering shot of what I took!

 There were vertical darts under the bust on the pattern, but I have a feeling we left them out as we had three bust darts already. One small issue I do need to fix is that the lining has started to poke out at the front. I don't know how it has happened, it's almost as if it has grown overnight. I think I'll just turn it up an inch and it'll be fine. Also, just so you know, this is the absolute shortest that I would wear a skirt/dress nowadays. I love a midi length ideally.


Anywho, I'm up to my eye's in cake and batter for a 'Alcoholic Afternoon Tea' Hen party that I'm hosting at my flat tomorrow. You should see the sitting room, it's so empty! I had to move loads of the sewing stuff out for it to be safe for people to be in. Hopefully no one steps on any pins!!!

LYLT,

Emmie xx

The Oz Dress - Elisalex FBA complete!

Sunday, 15 September 2013


Hi Guys!

I finally (FINALLY) finished my attempt at an Elisalex bodice with a full bust adjustment.
It's been a long time coming, as there were a few delays along the way, but I did post some progress pictures along the way on Instagram and Twitter.


I knew I definitely needed to adjust the bodice when I finished my last Elisalex.
 It fit, but it didn't fit the way it should! I definitely had the "Squished VonBoobies" look. I followed the FBA instructions written up by Elisalex (and by this point I actually understood them!), and did a 5/8" FBA, with another inch added to the bodice length (although next time I think I'll do 1.5"). I think I gave myself a tiny bit extra in the bust than my measurement just for comfort.

But with this comparison photo, even with the bodice just pinned together you can definitely see the improvement! Much more room, and the girls are much perkier, I'm sure you'll agree! The fabric is a blue Gingham (probably polycotton) I got at a market in Rye.


So what happened next was Delay 1. Which I think was pre-washing my lining. But that was easily fixed once I actually put it in the washing machine. Clever, eh?

Once I had the bodice lined I had to attach the gathered skirt FROM HELL.
I put the whole thing together, and then found loads of bits of the skirt that had caught up into the seam. 
Argh!
Then, upon rectifying each individual bit, I managed to catch other different bits. And upon fixing those I caught other bits. By the time I finished the skirt, with no bits caught up I was fit to go into the garden and set the whole thing alight.

And so Delay 2 happened. Wherein the half-finished dress sat on my dressform for weeks. I did at some point manage to cut out some lining to line the skirt, as I realised it was indecently see-through.

Then it sat there for another while, until I decided to bite the bullet and put the zip in. And I even took the time to hand-baste it first, although really it doesn't take that long at all!

And then yesterday I decided to knuckle down and get it finished before I died of old age.

And to be honest I actually love the stupid thing.


And I'm using my fancy new tripod that Mr.G bought me. It's super cool and I got to use my wireless remote! I used most of the width of the fabric for the skirt and I managed to somehow get the length I had wanted all along! The bodice length does actually look and feel good, but I think I only did a 1cm seam on the bodice/skirt as I knew I needed all the length I could get. Still might add a little more next time so I can do a full seam allowance.


Since taking this picture, I have realised how much lower my right shoulder is.
And this was me trying to not look so wonky! Although I feel stupid saying that with my wonky crossed legs.


I really can't believe how perfect the fit is. I'm definitely gonna be using these pieces as my Princess Seam Block now, and playing with neckline and back variations. But I doubt I will be doing another gathered skirt anytime soon.

I am, however, pretty happy with the skirt in general. It doesn't make me look AS big as I thought it might. I do look quite hip-py, although most of that is actually hip. My hips pop out almost straight after my waist.

The stitching on the hem wasn't my best, as I was more focused on (a) trying to get all the white stitching in the white line of boxes and (b) trying to keep the edge of the skirt a blue box. But at least I managed those two things!


I do however think my next couple of makes are not going to be fully lined, as I want a few nice quick makes! But it does look good. And it was definitely necessary for this fabric. I do however want to escape to the land of folded hems and bias bound hems for a bit. I'll avoid facing-land if I can.


The dress kind of makes me feel like a cross between Dorothy (Damn should've worn my red heels!) and a ballet dancer. And I secretly used to prance around when I was younger (until not that much younger), pretending I was one. So, for your pleasure, some ballet style posing :)


And that's it! I wore it to dinner last night, and it was lovely and comfortable, so I know it will get plenty of wear! Although it may have to wait until the weather is nicer...

I'll leave you with a final pic of me with my regular grumpy.resting.face


LYLT,

Emmie x


The Frankenstein-Dress (prologue)

Thursday, 6 June 2013

Just wanted to post a sneaky prologue of my new dress that I'm creating through another mash up of pattern pieces.

Am trying out my first Full Bust Adjustment! Here's a sneak peak at the adjustment on the right, and then a little trial of changing the darts on the left, as the massive horizontal dart with the vertical dart made for a square-ish boob!

An gonna work on it at the weekend.. If all goes amazingly well I might get to wear it to dinner at Goodwood House next weekend - or maybe to the Goodwood races :)

Exciting!


Made With Love By The Dutch Lady Designs